
How to apply your paint protection film perfectly
Your custom-fit PPF parts arrive weeded and ready to install – you don't need to cut anything. With wet application, a bit of patience and the right temperature, you'll achieve a clean, bubble-free result. This guide walks you step by step through the entire process.
Unpack your kit before you prepare your car or workspace, or before you book a client's car into your shop. Check that it's undamaged and complete, and that you've received the right parts. Report any problems to us immediately via live chat. Never start the installation with a damaged, incomplete or wrong kit. Of course we'll replace it, but only if you haven't started installing it yet. Damage that occurs while applying the PPF is covered only by our installation insurance.
What you'll need
Included in the delivery
- TP squeegee for pushing out water and air
- TP spray bottle for the slip solution
- Custom-fit, weeded film parts – only the parts you ordered, ready to install. For Full Kits, the parts come on several cutting sheets.
Slip solution (mix it yourself)
2 to 3 drops of dish soap or baby shampoo per 250 ml of water, 4 to 5 drops per 500 ml. The solution reduces adhesion so you can slide the film freely for a few minutes and position it precisely – after squeegeeing it sits firmly.
Tack / fixing solution (optional)
Not strictly necessary, but it makes installation noticeably easier and is therefore recommended: mix 1 part Isopropanol 99.9 % with 9 parts water (never exceed this ratio). Use it to fix corners and reference points so the film holds there immediately.
Also helpful
- Several microfiber cloths
- Hair dryer or heat gun
- Good, bright lighting
- Isopropanol or a clay bar for stubborn dirt
- Plastic sheeting to cover the wheels
The right place & preparation
Environment
Work in a warm, wind-free and dust-free room at a minimum of 20 °C. Make sure you have good lighting and a power outlet nearby for the dryer. Below 18 °C the application becomes considerably more difficult – temperature is the most important factor for a good result.
Clean the vehicle
Wash the car thoroughly by hand (better than a car wash): foam it, wipe it down, rinse with clean water and dry with microfiber cloths. Right before installation, wipe the surfaces down once more with slip solution, especially in gaps, along edges and behind bumpers and fenders. Remove stubborn dirt such as bird droppings, insects or grease with Isopropanol or a clay bar. Cover the wheels with plastic sheeting so no dust gets stirred up.
Step by step
We apply wet – work calmly, cleanly and without rushing, and every part will turn out well.
Clean the surfaces
Clean the body surfaces to be covered and the surrounding areas with water and dish soap so nothing gets dirty again during installation. Dry with a lint-free cloth and check that everything is free of dirt, dust, insects and grease.
Mix the slip solution
Fill the TP spray bottle with tap water and add 2 to 3 drops of dish soap or baby shampoo (4 to 5 drops for a 500 ml bottle). The mixture reduces adhesion so the film can be slid around for a few minutes – after squeegeeing it sits firmly.
Spray the surface & film, then apply
First spray the body surface generously. Then peel off the film and spray both sides, especially the adhesive side – there must be no dry spots. Caution: Don't mix up the parts for the left and right sides of the vehicle! Place the film adhesive-side down and slide it into the right position. If the mixture dries out too quickly, simply spray the surfaces again.
Align & stretch
Align the film using the pre-cut reference points and the markings at the corners. The kits are designed to be stretched: at some edges the film seems 1 to 3 cm too short until you've stretched it properly – this is intentional. Pull it as needed to reach the 3D curvature and to pull out wrinkles. The film keeps its stretched shape after drying.
Secure the alignment (optional)
The film holds even without additives. If you'd like more grip at tricky corners or curves, a tack / fixing solution (1 part Isopropanol to 9 parts water) often makes it easier. But it's not required.
Squeegee from the center outward
Push water and air out with the TP squeegee always from the center outward, never inward. Repeat the strokes until the film adheres across the whole surface and there are no more bubbles. Air bubbles don't disappear on their own; if they stay trapped, you'll have to open them later with a needle.
Fold edges & cure
Depending on the temperature, the film adheres strongly after a few minutes up to an hour. You can speed this up with a hair dryer or heat gun – keep the surface below 70 to 80 °C. Wrap-around edges on the hood, bumper and fender are easiest to fold over once the adhesive has already set slightly. First apply the remaining surfaces, then fold over the edges.
Part-specific tips
Expand the relevant vehicle part: with a pro tip, image, installation video and matching products.
Door handles
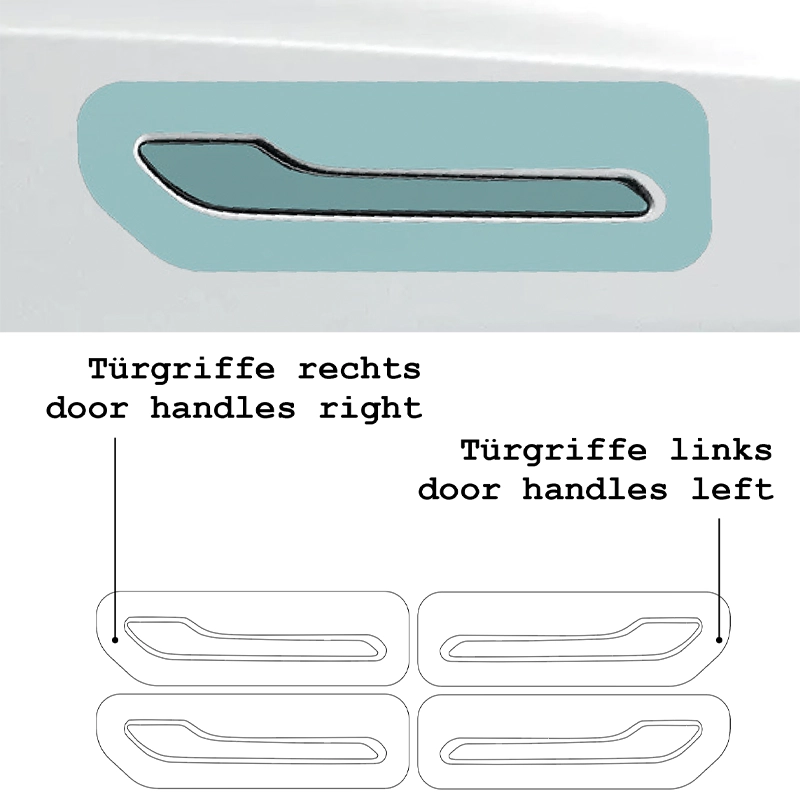
The surfaces around the door handles are among the easiest parts: almost flat and barely any stretching. Spray the surface and the adhesive side generously with slip solution, place the film and align it with the door handle cutout. Slide it around until it sits exactly right.
Then squeegee the water out from the center outward until no more bubbles are visible, and press the edges down firmly at the end.
Bumper (front)
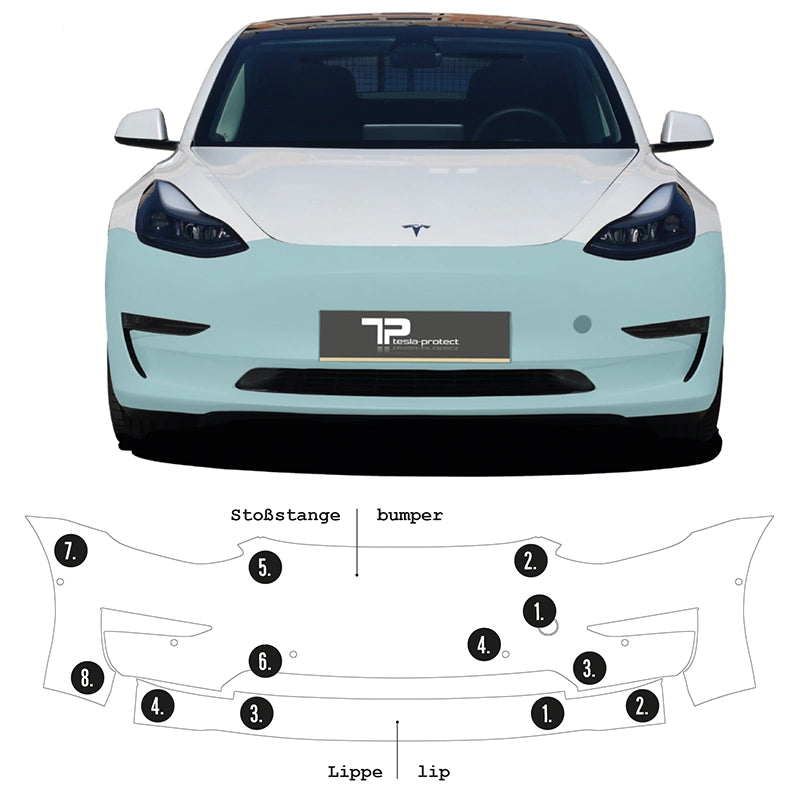
Because of its strong 3D curvature, the bumper is the most demanding part – plan for a good 1.5 to 3 hours. Start at the tow hook opening: fix the film there, align it with the reference points on that side and then stretch it horizontally to the opposite side.
A heat gun or hair dryer helps enormously to lay the film cleanly onto the curves. If the film sticks too early, simply spray the surface again with slip solution. Don't give up: applied correctly, it fits cleanly. Depending on the model, there's an easy, medium or difficult version.
Hood
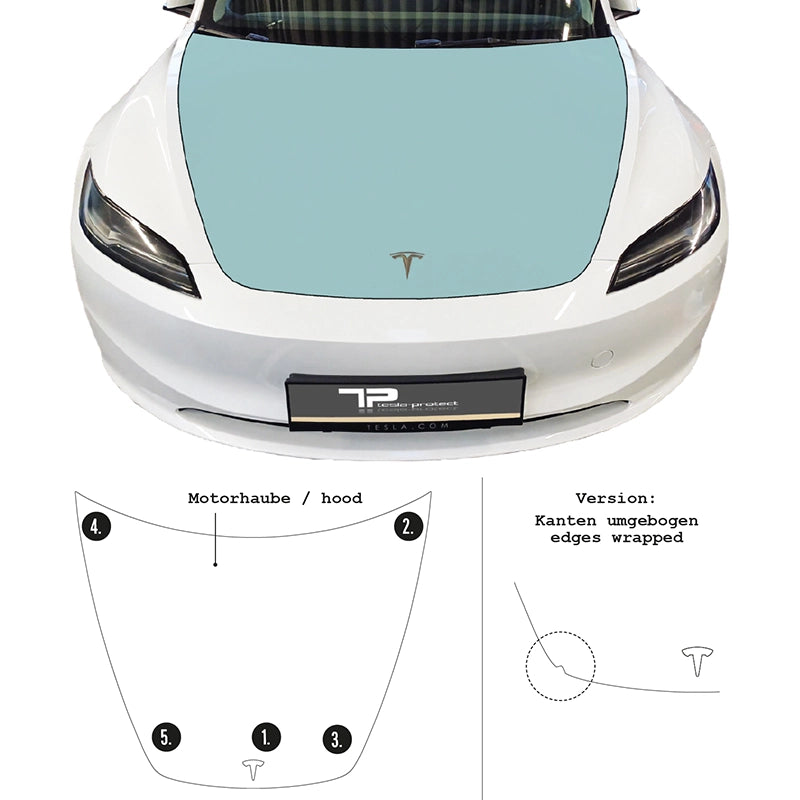
The hood has a slight 3D curvature and needs a bit of overall stretching (up to about 3 cm). Center the film at the bottom middle on the emblem and fix that point. Then align one upper corner, stretch to the opposite corner (using the reference points) and work your way outward. Squeegee from the center outward and upward.
On the Model Y Juniper, the edges of the hood are already folded over, so you automatically get the clean, edgeless look.
Fenders
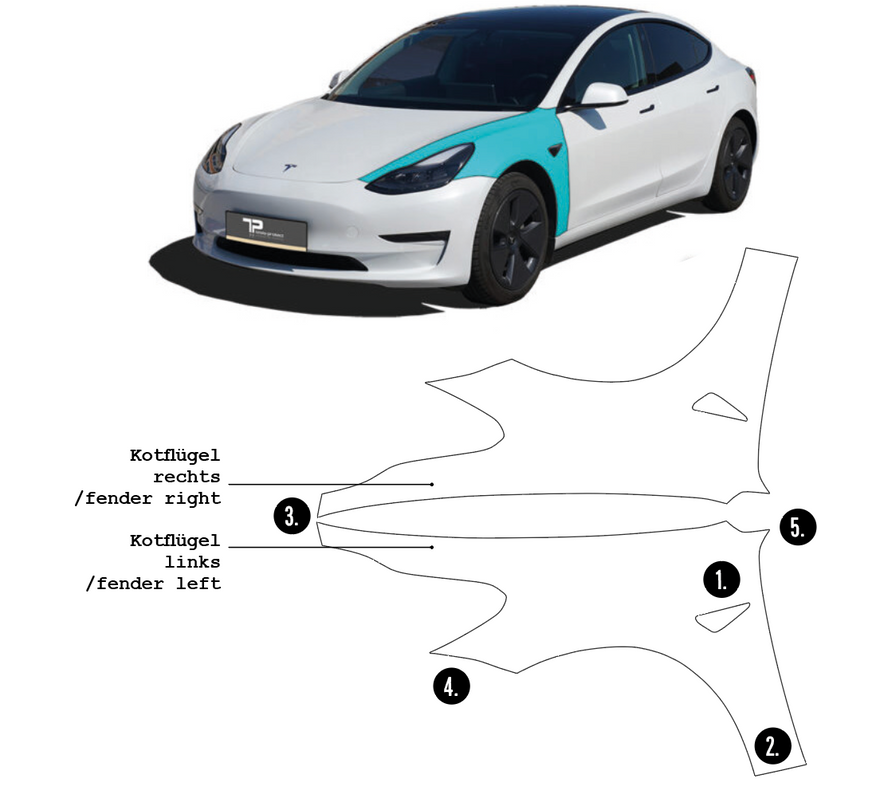
First align the film around the cutouts (turn signal, side camera and, if applicable, charging port) and fix it there before laying down the rest. Then work from the top at the A-pillar toward the front and down.
The cutouts for the charging port are deliberately cut slightly smaller: the small border is meant to be folded inward.
Headlights
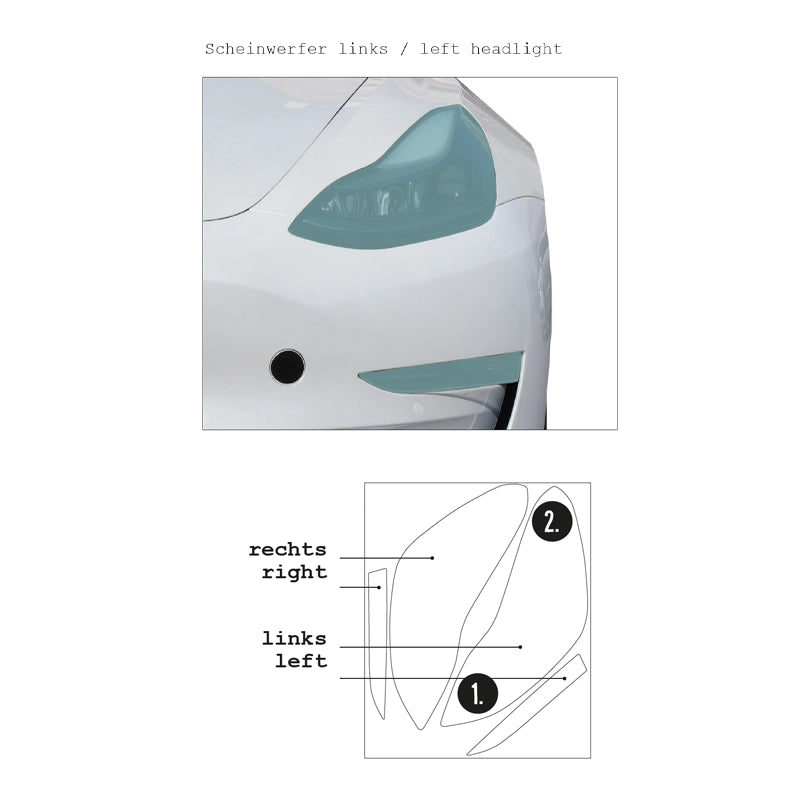
Clean the headlights especially thoroughly – every speck of dust shows here. Spray the surface and the film, align at the edges and squeegee from the center outward. Lay small curves cleanly with a little heat (dryer).
Sidekit large (rocker panels)
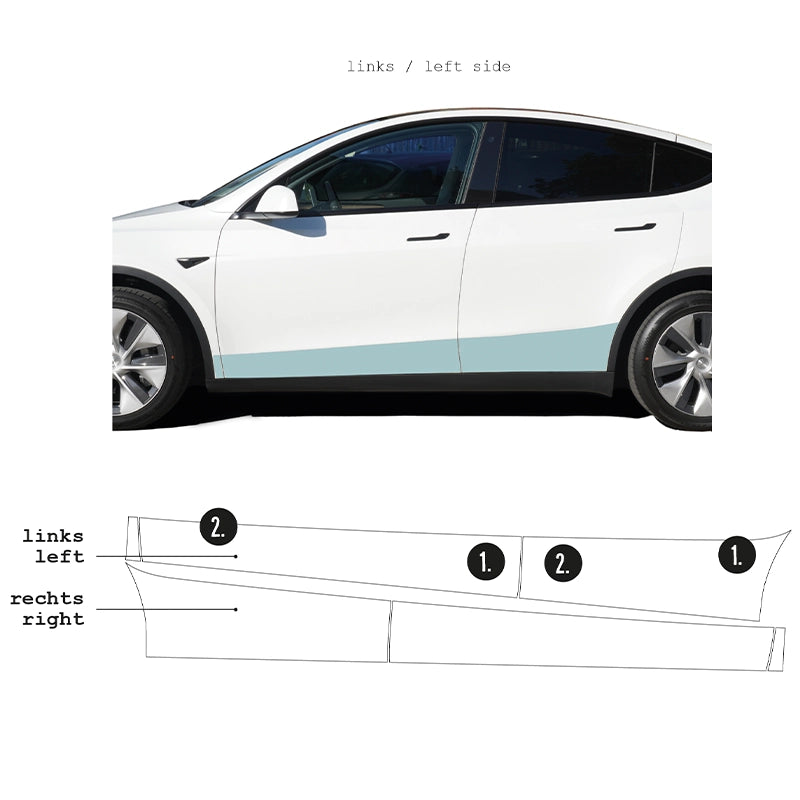
The rocker panels are long, but mostly flat. Work calmly from one end to the other, align at the top and bottom edges and squeegee the water out evenly. At the wheel arches, stretch the film slightly and lay the edges cleanly.
Sidekit small
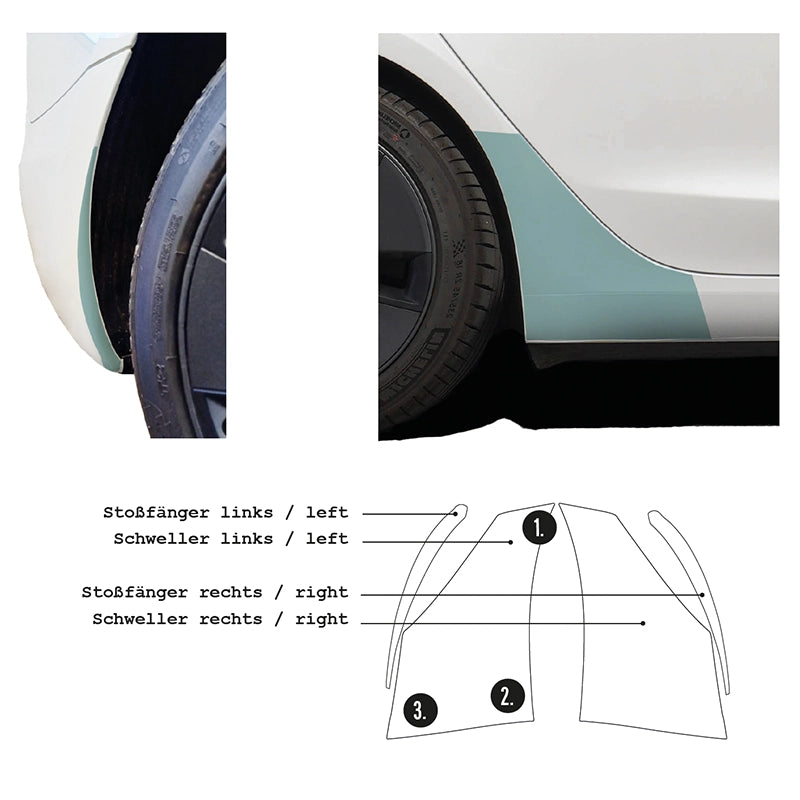
The Sidekit small covers the rear door and wheel arch area and needs almost no stretching. Place the film corner to corner along the alignment edges and squeegee the water out. One of the more straightforward parts.
Loading edge
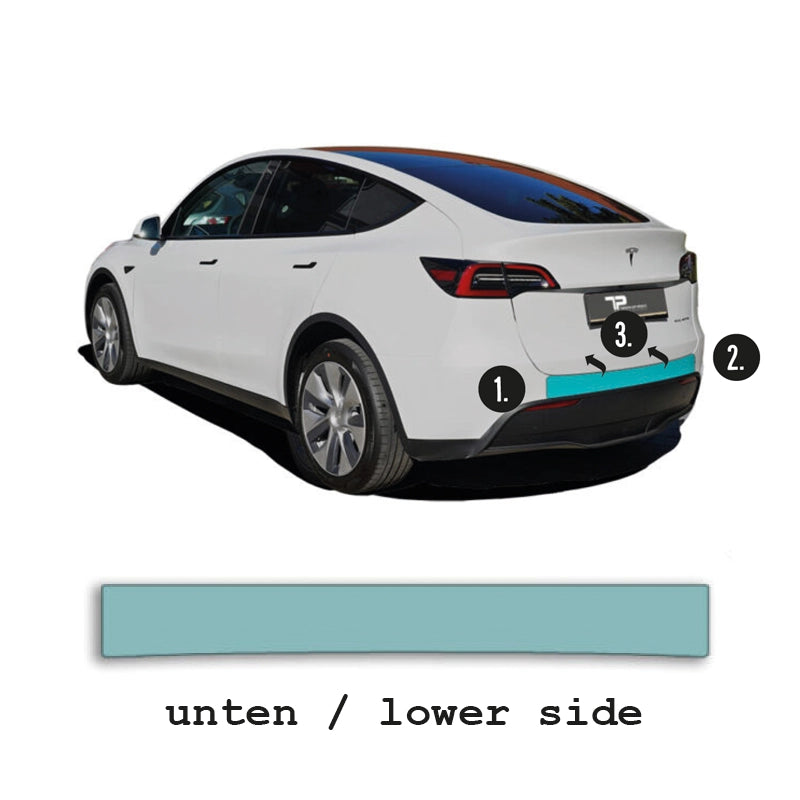
Open the tailgate before installation. Stretch the film slightly crosswise and lay it up over the edge. On models with ultrasonic sensors (USS), align yourself with these.
Applied correctly, the edge folds over almost flush, without lifting at the transition.
Curing & care
Press the edges down again
After a few hours, and again the next day, press all the edges down firmly with your finger so they set cleanly.
Milky? No problem
If the film looks milky or cloudy at first, don't peel it off – that's trapped moisture. It clears up within hours to 1 to 2 days, even faster in direct sunlight.
Don't wash for 48 h
Don't wash the car for at least 48 hours and avoid rain so the edges set firmly. With warm application and well-fixed edges, you can drive the same day.
Still unsure? We're here to help.
Start with the flattest, easiest parts – for example doors or the roof – before you tackle heavily curved parts. Every part is doable. Don't give up, and rather contact us before you throw a film away. We'll help you out quickly.
Installation Videos
On our YouTube channel you find Installation Videos for our products.
If you have any questions, please feel free to contact us via live chat.